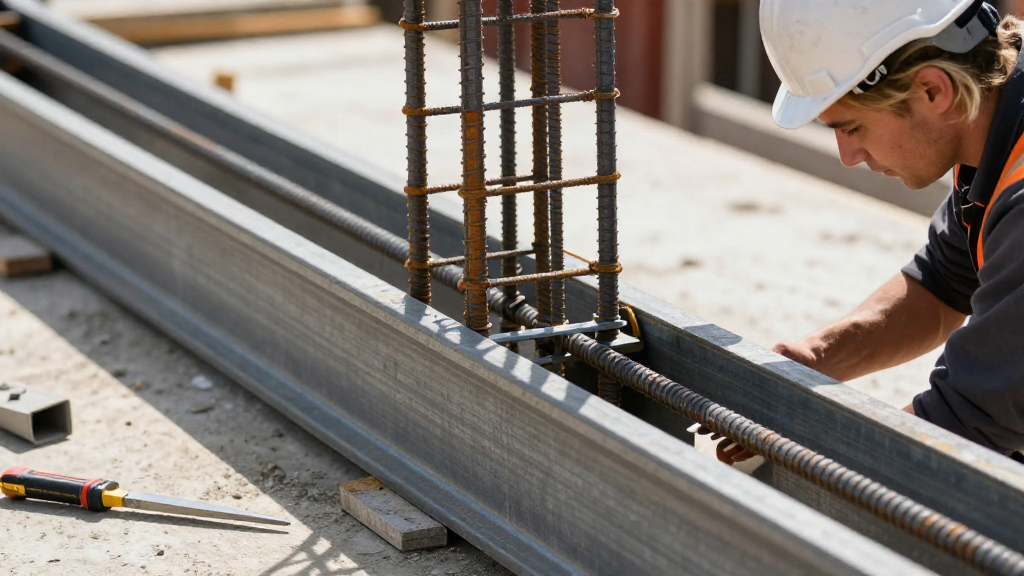
Beam rebar placement is a critical process in construction projects that ensures the structural integrity of concrete beams.
Proper installation of rebar significantly enhances the load-bearing capacity of beams and prolongs their lifespan.
What Is Beam Rebar Placement?
Beam rebar placement refers to the strategic arrangement of reinforcing steel bars (rebar) within concrete beams.
This process helps in distributing loads and provides tensile strength, making the concrete beam resistant to bending, shear, and cracking.
Key components of beam rebar placement include:
- Reinforcing Bars (Rebar): Steel bars that help improve tension resistance.
- Concrete Mix: Mixture of cement, sand, gravel, and water used to form the beam.
- Forms: Framework to hold the concrete until it cures.
- Anchorage: Connection points for the rebar to ensure stability.
Why Is Proper Placement Important?
Understanding the importance of proper beam rebar placement is essential in construction for several reasons:
- Structural Integrity: Properly placed rebar prevents cracking and increases the lifespan of the structure.
- Load Capacity: Correct placement ensures the beam can handle the loads imposed on it during its lifecycle.
- Safety: Properly designed and installed rebar mitigates risks associated with structural failures.
How Do You Prepare for Beam Rebar Placement?
Before diving into the actual beam rebar placement process, several preparatory steps are crucial:
1. Review Design Specifications
- Structural Drawings: Examine plans to understand the rebar layout.
- Load Requirements: Determine the expected loads that the beam will support.
- Building Codes: Ensure compliance with local and national codes for rebar placement.
2. Gather Necessary Materials
- Rebar: Purchase the correct size and grade as specified in the design.
- Concrete Mix: Select an appropriate concrete mix based on the project’s requirements.
- Tools and Equipment: Have necessary tools on hand, including:
- Tying wire and pliers
- Wire cutters
- Measuring tape
- Level and square
3. Prepare the Worksite
- Site Clearance: Ensure the area is clean and free from debris.
- Set Up Forms: Construct forms that meet specified dimensions and allow for rebar placement.
How to Position Rebar in a Beam?
The actual process of beam rebar placement involves several steps. Here’s a detailed guide:
1. Cut the Rebar
Cut the rebar according to the specified lengths in the structural design.
2. Shape the Rebar
Using a rebar bender, shape the rebar into the required configuration.
Typically, you’ll need:
- Main Bars: Horizontal reinforcements that run along the length of the beam.
- Stirrups or Ties: Vertical or inclined bars that provide additional horizontal strength.
3. Create a Rebar Placement Template
Using the design drawings, create a template for proper positioning.
4. Place the Main Bars
- Position Horizontally: Place the main bars parallel to the length of the beam.
- Elevate With Chairs: Use plastic or metal rebar chairs to keep the bars elevated within the beam forms.
5. Install Stirrups/Ties
- Form a Cage: Place stirrups or ties every 12 to 16 inches along the length of the beam.
- Secure in Place: Use tying wire to secure the intersection points of the stirrups and main bars.
6. Ensure Proper Cover
Make sure that the rebar has sufficient concrete cover as per the design specifications.
This cover protects against corrosion and enhances fire resistance.
What Are Common Mistakes to Avoid in Beam Rebar Placement?
Effective beam rebar placement requires precision. Here are some common mistakes to avoid:
- Incorrect Measurements: Double-check all measurements to ensure they meet design specifications.
- Improper Tying: Securely tie all intersections to prevent shifting during concrete pouring.
- Insufficient Cover: Ensure adequate concrete cover to offer protection to the rebar.
- Ignoring Local Codes: Always comply with local building codes and standards.
How Do You Pour Concrete Over Rebar?
After proper beam rebar placement, follow these steps for pouring concrete:
1. Mix the Concrete
Prepare the concrete mix according to the manufacturer’s instructions.
2. Pour the Concrete
- Carefully Pour: Begin pouring concrete at one end of the beam and allow it to flow evenly.
- Vibrate the Concrete: Use a concrete vibrator to eliminate air bubbles and ensure proper settling around the rebar.
3. Finish the Surface
Use a trowel to finish the surface of the concrete for a smooth finish.
How to Cure Concrete After Beam Rebar Placement?
Curing is essential for the development of concrete strength.
- Cover the Beam: Use curing blankets or plastic sheeting.
- Moisten the Surface: Keep the surface moist for at least 7 days. This helps to prevent cracking and ensures proper hydration.
- Check for Strength: Conduct tests as required to ensure the concrete has reached the desired strength before subjecting it to loads.
Conclusion: Why Mastering Beam Rebar Placement Matters
Beam rebar placement is intricate yet essential for any concrete construction project.
Understanding the entire process—from preparation and placement to pouring and curing—can significantly influence the structural integrity and safety of a building.
Whether you are a seasoned contractor or a DIY enthusiast, mastering these skills will ensure successful and durable construction outcomes.
Always remember the importance of proper planning, adherence to design specs, and compliance with building regulations in your beam rebar placement tasks.
By following these guidelines, your beams will not only be strong but also stand the test of time, ensuring your structures remain safe and secure for years to come.